With 3D CSS transformations

Fish and sea illustrations by Val Head
Tutorial
Time required : 1 hour
Pre-requisites : Basic JavaScript, HTML and CSS
What is covered : Moving elements in 3D, basic interactivity, animation, sound
HTML5 canvas is of course brilliant. But it has to be said, performance on iPads (and most other devices) leaves much to be desired. The GPU accelerated canvas in iOS 5 is a definite improvement, but it’s possible to create even smoother animated graphics with CSS manipulated in JavaScript, that runs lightning fast even on a first generation iPad.
Using transformations, you can move HTML elements in 3D space (currently supported by most modern browsers, check caniuse.com for up to date support information). And when you transform HTML elements in 3D, they are automatically rendered by the GPU, which massively improves performance.
This works so well on iOS, so read on to find out how to make a game that runs at a super smooth 60 frames per second!
The game elements
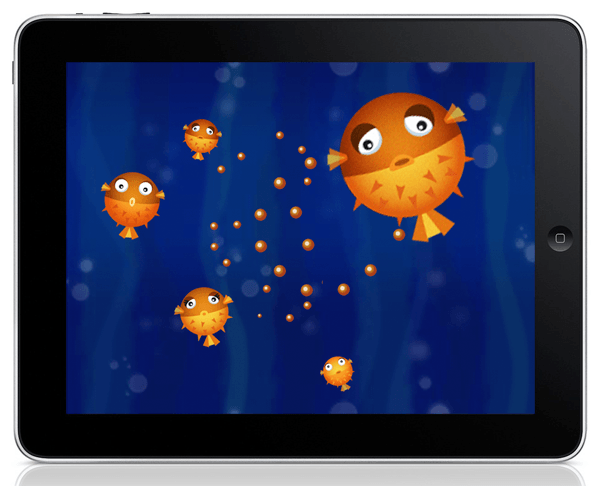
So here’s our game. We have puffer fish rising up from the bottom of the sea, and when you touch them they explode. It’s a strange narrative but Angry Birds is pretty strange too and that seems to be doing OK.
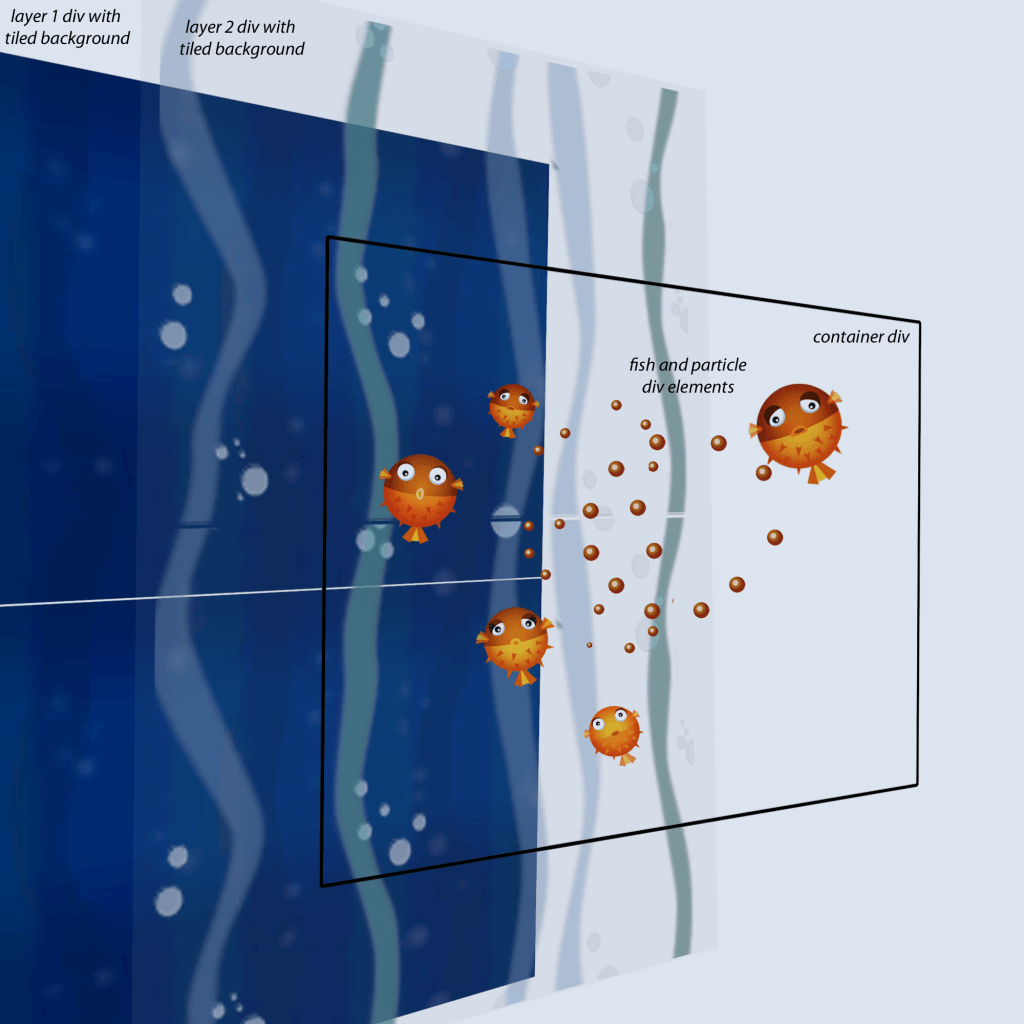
We have three main visual components here, the puffer fish, the background layers, and the particles when the fish explode.
Every graphical object is a DOM element, in fact they’re all just divs with image backgrounds and I’m animating them by adjusting their CSS properties with JavaScript.
Game variables
file: Burst.html
47 48 49 50 51 52 53 54 55 56 57 58 59 60 61 62 63 64 65 66 67 | // DOM elements var container = document.createElement('div'), layer1 = document.createElement('div'), layer2 = document.createElement('div'), // screen size variables SCREEN_WIDTH = 1024, SCREEN_HEIGHT = 768, HALF_WIDTH = SCREEN_WIDTH / 2, HALF_HEIGHT = SCREEN_HEIGHT / 2, // fish variables fishes = [], spareFishes = [], counter = 0, burstSound, // the particle emitter emitter = new Emitter(container); |
container is a div element that contains the fishes and particles, layer1 and layer2 the two watery background divs.
We need half the width and height for working out the centre of the screen. Fish objects are stored in the fishes array, and spareFishes is used to store the fishes we’re not currently using.
Counter is incremented every frame (you’ll see what that’s for later), and burstSound is played when a fish explodes.
We also create a particle emitter – it’s a custom object defined in particles.js that creates and updates our explosion particles.
The container’s 3D properties
72 73 74 75 76 77 78 79 80 81 82 83 84 85 | // set up the CSS for the DOM elements layer1.className = "parallax"; layer1.style.background = 'url(img/parallaxBack.jpg)'; document.body.appendChild(layer1); layer2.className = "parallax"; layer2.style.background = 'url(img/parallaxFront.png) transparent'; document.body.appendChild(layer2); container.className = "container"; container.style.webkitPerspective= "400"; container.style.webkitPerspectiveOrigin= HALF_WIDTH+"px "+HALF_HEIGHT+"px"; container.style.width = SCREEN_WIDTH; container.style.height = SCREEN_HEIGHT; |
There are CSS styles at the top of the document as you would expect, but we’re also setting some of here with JavaScript. Notice container.style.webkitPerspective, which specifies how extreme the 3D perspective is. This is like field of view, or how wide-angled our camera is. The webkitPerspectiveOrigin should be the middle of your game screen, otherwise things will disappear into the top left as they move into the distance.
Events and Game loop timer
90 91 92 93 94 | function init() { initMouseListeners(); setInterval(gameLoop, 1000/60); } |
We use setInterval to call gameLoop() 60 times a second. As setInterval requires a time in milliseconds, we need to know how many mils there are per frame. We first convert frames-per-second to seconds-per-frame by inverting to give us 1/60. Then convert seconds per frame to mils per frame by multiplying by 1000 – so we get 1000/60.
Did I just lose you? Don’t worry, all you need to know is that to convert fps into mils per frame, divide 1000 by the frame rate.
Game loop overview
96 97 98 99 100 101 102 103 104 105 106 107 108 109 110 111 112 113 114 115 116 117 118 119 120 121 122 123 124 125 126 127 | function gameLoop() { // every 20 frames, make a new fish if(counter++%20==0) makeFish(); // update the parallax layers layer1.style.webkitTransform = "translate3d(0px, "+(-768 +((counter*5)%768))+"px, -999px) scale(4)"; layer2.style.webkitTransform = "translate3d(0px, "+(-768 +((counter*10)%768))+"px, -998px) scale(4)"; // iteratate through each fish for (i=0; i<fishes.length; i++) { var fish = fishes[i]; if(!fish.enabled) continue; // update the fishes position properties fish.update(); // and then update the visible object for that fish fish.render(); // if the fish is way off the top of the screen, then // remove it. For the finished game you would probably // add some kind of score penalty at this point. if(fish.posY <-200) removeFish(fish); } // then update all the particles. emitter.update(); } |
Here is the main game loop. Hopefully the comments explain enough about what’s going on. We’re adding more fish, updating the parallax layers, iterating through all the fish and updating them all, then finally calling emitter.update() which looks after the particles.
Making new Fish
99 100 | // every 20 frames, make a new fish if(counter++%20==0) makeFish(); |
Here’s a trick I often like to use when things need to happen periodically. I’m using a counter variable that is incremented every frame. The % sign denotes modulus and this returns what is left when you divide the first value with the second. For example : 4 % 2 = 0, 5 % 2 = 1, 11 % 10 = 1, 345 % 10 = 5. So counter%20 will be 0 every 20 frames.
So every 20 frames we’ll make a new fish.
The Fish object
Check out Fish.js – it’s our Fish object that handles the position, update and appearance of our fish. The constructor parameters specify its 3D position, the image URL, and the image size. We’re creating an HTML div element and setting its CSS properties so it has a fixed size, absolute position, and a background image.
Fish update
File : Fish.js
33 34 35 36 37 38 39 40 41 42 43 44 45 46 47 | this.update = function() { // add gravity force to the y velocity this.velY += this.gravity; // and the velocity to the position this.posX += this.velX; this.posY += this.velY; this.posZ += this.velZ; //rotate pos and vel around the centre counter++; this.rotate(2); }; |
Here’s the Fish.update() function.
As well as x, y and z position, we also have an x, y and z velocity. Velocity is how much it moves in each direction every frame.
First we add gravity to velY (the y velocity). This is part of the simple physics system, and in most circumstances gravity would be a positive number that gets added to velocity making things fall down. In our case we’re subverting this system by giving gravity a negative value! This makes our fish accelerate upwards, which makes our game a little harder.
Fish render
49 50 51 52 53 54 55 56 57 | this.render = function() { var dom = this.domElement, styleStr, sx = Math.sin(counter*0.4)*0.04 + this.size, sy = Math.sin(Math.PI + counter*0.4)*0.04 + this.size; dom.style.webkitTransform = "translate3d("+this.posX+"px, "+this.posY+"px, "+this.posZ+"px) scale("+sx+","+sy+") rotate("+Math.sin(counter*0.05)*20+"deg)"; }; |
This is a pretty scary looking function, but it’s quite simple at its core – it updates the DOM element’s style properties to move, scale and rotate the fish. It looks complex because we have to make the strings that adjust these properties.
The weird looking Math.sin function uses a sine wave to affect the fishes x and y scale, stored in sx and sy. This makes the fish wobble and look kinda squishy, like it’s swimming through water.
The last line sets the CSS property webkitTransform, and we’re adjusting translate3D which is the 3D transformation. Then it’s scaled in both x and y axis (the wobble). And finally it’s rotated in 2D using another sine value that causes the fish’s left and right oscillating rotation.
Making fish
File: Burst.html
132 133 134 135 136 137 138 139 140 141 142 143 144 145 146 147 148 149 150 151 152 153 | // create a new fish in the bottom middle of the stage if(spareFishes.length>0) { // if one is already in the spare array, recycle it fish = spareFishes.pop(); fish.enabled = true; fish.domElement.style.visibility = "visible"; } else { // otherwise make a new one // Work out the fishimage URL var fishImageURL = "img/orangefish0"+((fishes.length % 4) + 1)+".png"; // and then make a new fish object fish = new Fish(0, 0, 0, fishImageURL, 128, 128); // add it into the array of fishes fishes.push(fish); // then add touch and mouseover events to the fish. fish.domElement.addEventListener("mouseover", fishMouseOver, true); fish.domElement.addEventListener("touchstart", fishTouched, true); container.appendChild(fish.domElement); } |
Back in Burst.html, here’s the makeFish(…) function. First of all we check to see if there are any fishes for reuse (more on that below), and if not we create a new one. Notice that we’re using the modulus (%) operator to make sure the fish image number is never higher than the number of fish images we have.
Then we’re adding touchstart and mouseover event listeners for the fish’s DOM element, so that we know when the fish have been hit. If you’re playing it on your desktop you only have to move your mouse over the fish to burst them!
Setting the fish properties
155 156 157 158 159 160 161 162 163 164 165 | fish.posX = HALF_WIDTH + randomRange(-250,250); fish.posY = SCREEN_HEIGHT+100; fish.posZ = randomRange(-250,250); // give it a random x and y velocity fish.velX = randomRange(-1,1); fish.velY = randomRange(-1,-2); fish.velZ = randomRange(-1,1); fish.size = 1; fish.gravity = -0.05; |
Here’s where we set each fish’s position to be in the middle bottom of the screen plus a random x and z offset between -250 and 250. We also give it a slightly random velocity and a gravity of -0.05 – this is the negative gravity value I mentioned before and it makes the game a little more fun – the longer it takes to hit the fish, the faster they move.
Recycling the fish
169 170 171 172 173 174 175 | function removeFish(fish) { fish.enabled = false; fish.domElement.style.visibility = "hidden"; spareFishes.push(fish); } |
We have to get rid of the fishes when they explode or go off the screen. We could just take them out of the array and forget about them, but this is bad for memory management. Even if they are cleared out of memory with the garbage collector, it still takes CPU to constantly create new DOM elements and JavaScript objects.
So we’ve made a simple pooling system, when we’ve finished with a fish, we disable it (by setting its enabled property to false) and add it into the spareFishes array. We leave its DOM element in our document, but we set its visibility to “hidden”.
So in the makeFish() function above, we check if there are any fish objects in this spareFishes array to reuse before we make a new one.
Exploding the fish
175 176 177 178 179 180 181 182 183 184 185 186 187 188 189 190 191 192 193 194 195 | function fishMouseOver(event) { event.preventDefault(); var fish = getFishFromElement(event.target); if(fish) explodeFish(fish); } function fishTouched(event) { event.preventDefault(); for(var j=0; j<event.changedTouches.length; j++) { var fish = getFishFromElement(event.target); if(fish) explodeFish(fish); } } function getFishFromElement(domElement) { for(var i=0; i<fishes.length;i++) { if(fishes[i].domElement == domElement) return fishes[i]; } return false; } |
Here are the listeners that are called when you touch or mouse-over a fish. In both, we need to find the fish object for the DOM element that fired the event. Note that the touchstart event has an array of touch objects – it may well be that you touched down with multiple fingers at once.
function explodeFish(fish) { playBurst(); emitter.makeExplosion(fish.posX, fish.posY, fish.posZ); removeFish(fish); } |
When we find the fish that was touched (or moused-over), we call explodeFish(…) – that plays the explode sound, calls makeExplosion(…) on the particle emitter (creating a burst of little particles) and finally calls the removeFish(…) function.
Particles

Exploding fish particles
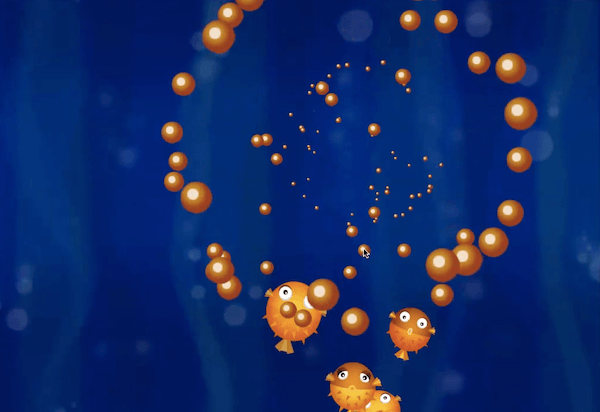
We don’t have room in this tutorial to look at this particle system in detail, but it’s very similar to how we manage the fish. The particle emitter has its own update loop, and each particle has a DOM element, position and velocity. It just uses a slightly different physics model which includes drag and a shrink factor that causes the particles to get smaller.
Have a look through the Particles.js file and see if you can work out how it works. (If you get stuck, some of my old tutorials might help).
Parallax layers
102 103 104 | // update the parallax layers layer1.style.webkitTransform = "translate3d(0px, "+(-768 +((counter*5)%768))+"px, -999px) scale(4)"; layer2.style.webkitTransform = "translate3d(0px, "+(-768 +((counter*10)%768))+"px, -998px) scale(4)"; |
I’ve implemented a parallax layer system with two background layers moving at different speeds to give the impression of 3D depth. Each one is a div that is twice the height of its image, and I move each y position relative to a counter.
The layer behind moves slower than the layer in front; I’m multiplying the counter by 5 for the back layer’s y position. Remember that counter increments every frame, so our back layer will move down 5 pixels per frame.
The front layer moves twice as fast. We use the modulus of the screen height to ensure that when the position gets too high, it’s reset down again. The div images tile vertically so you don’t notice this reset.
This method of moving the front layer faster than the back one gives the illusion of 3D depth and is known as parallax scrolling.
I tried several different ways of implementing this (including adjusting the background image offset of a static div), but this method seems the most performant. Notice that I’m setting the translateZ CSS property to 0 to enable 3D rendering which triggers GPU acceleration, even though I’m not actually moving it in 3D!
Disabling default touch / mouse behaviour
181 182 | function fishTouched(event) { event.preventDefault(); |
Default actions happen on touch events: if you touch and drag you scroll the web page. On some devices a menu appears on a long touch. We need to disable these default actions by calling event.preventDefault().
For a production ready game, we should probably also listen to orientation change events and rescale our game accordingly, but this tutorial code has been kept as simple as possible.
Creative coding
As programmers, the responsibility for playability and responsiveness lies squarely on our shoulders, so it’s a skill we need to acquire. Anyone can program a character running along a platform, it’s harder to adjust the speed, gravity and control to make it feel fun. It’s a creative skill that requires practice and a process of constant iterations.
CreativeJS
Over the last few months I’ve been running small and exclusive training workshops to teach a wide variety of graphical programming techniques, including particle systems, game programming and mobile optimisation.
This tutorial is part of a new two day course I’m putting together – CreativeJS Games. Sign up to the mailing list if you want to be the first to hear when they become available. I’ll be taking it across Europe and the US.
The alumni on my courses still share their continuing explorations on twitter and I’d love to see what you do with this. But most of all have fun playing and experimenting with the rich graphical creativity that is now available to you in JavaScript!

